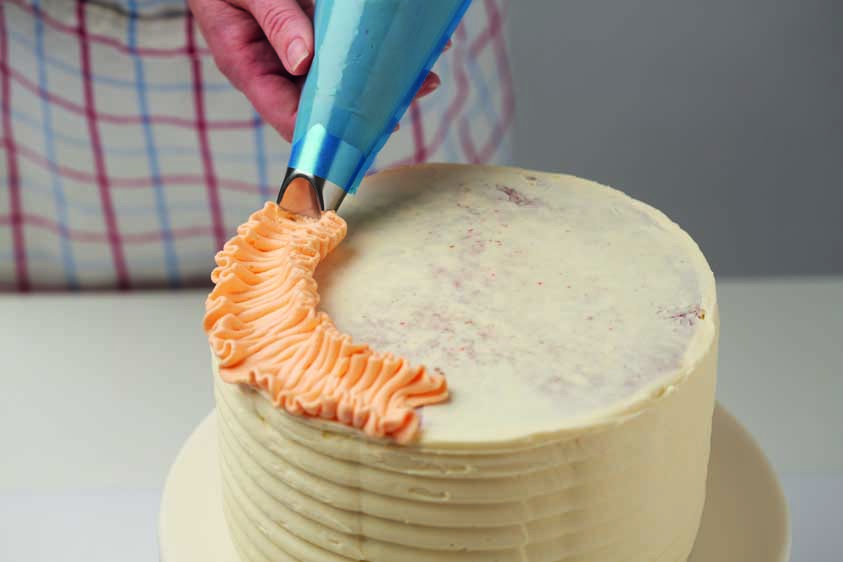
 There are some basic piping techniques that you’ll come back to time and again. Find out how to master them, then below is the mess-free way to fill a piping bag.
- Straight line
Hold the bag between your thumb and your index and middle fingers and use your other hand to hold the bag steady, if necessary. Touch the tip of the nozzle or bag onto the surface that you want to ice. Squeeze out the icing using light pressure. Once the icing has come out, lift the nozzle up slightly, so that it’s no longer touching the surface. Move your hand in a straight line and keep the pressure on the bag even. Your line will break if you squeeze too lightly and look lumpy if you squeeze too hard. When you’ve reached the end of the line, stop squeezing, touch the nozzle down lightly and pull it away.
Exercise: Practise piping short parallel lines next to each other, getting gradually longer.
- Dot
Squeeze the bag with gentle, steady pressure until you’re happy with the size of the dot. The longer you squeeze for, the bigger the dot will be. When you lift the nozzle away, your dot may get a small peak. To get rid of it, dampen a flat brush or your fingertip and gently pat the peak down. For tiny dots and fine details like flower stamens, use a round nozzle with a small hole. Round nozzles come in a variety of sizes, so you can experiment with getting different dot and spot sizes.
Exercise: Squeeze out a dot, then pipe a long line coming out of it.
- Dotted trail
A cross between a line and a dot – dotted trails (also called snail trails) make great border details around the base or edges of cakes. Squeeze the piping bag gently to pipe a dot, as above, but instead of lifting the nozzle away completely, stop squeezing and pull it through the dot to create a tapering tail. At the tip of the tail, squeeze a second dot and do the same again. There should be no space between the end of the tail and the next dot – it makes one continuous trail.
Exercise: Try this technique with other nozzles – it works particularly well with a small star nozzle.
- Scallop
This useful piping technique looks great on the borders of cookies and also around iced name plaques. To make sure your scallops are an even size, press light dots in the icing where you want each scallop to start. Measure them out with a ruler, if necessary. Touch the nozzle to the first dot and gently squeeze. Lift the nozzle slightly and move it in a curve. To end the curve, touch the nozzle to the second dot and repeat the process.
Exercise: Vary the size of the scallops you pipe from very small to long, deep and wide.
- Loop
If you’re a beginner, mark out light dots like you did for the scallop (above) and also mark out where you want the top of each loop to be by pressing a small mark into the icing. Start off as you would for the scallop, but continue gently squeezing out the icing, looping it up
to your guide marker, round in a tight curve and back down again. Make sure you lift the nozzle on the way back down again, so that you don’t drag the tip through the line you’ve already iced.
Exercise: Start off piping loops using markers to help you, but continue when the line or marker ends.
- Zig-zag
The easiest way to pipe zig-zags is to mark out the top and bottom points of each triangle, using a ruler to help you. When you’ve built up your confidence, have a go at piping zig-zags without any guides.
Exercise: Try to pipe a line of zig-zags that get gradually larger in size.